Digital contact sheets

The setup for contact prints.

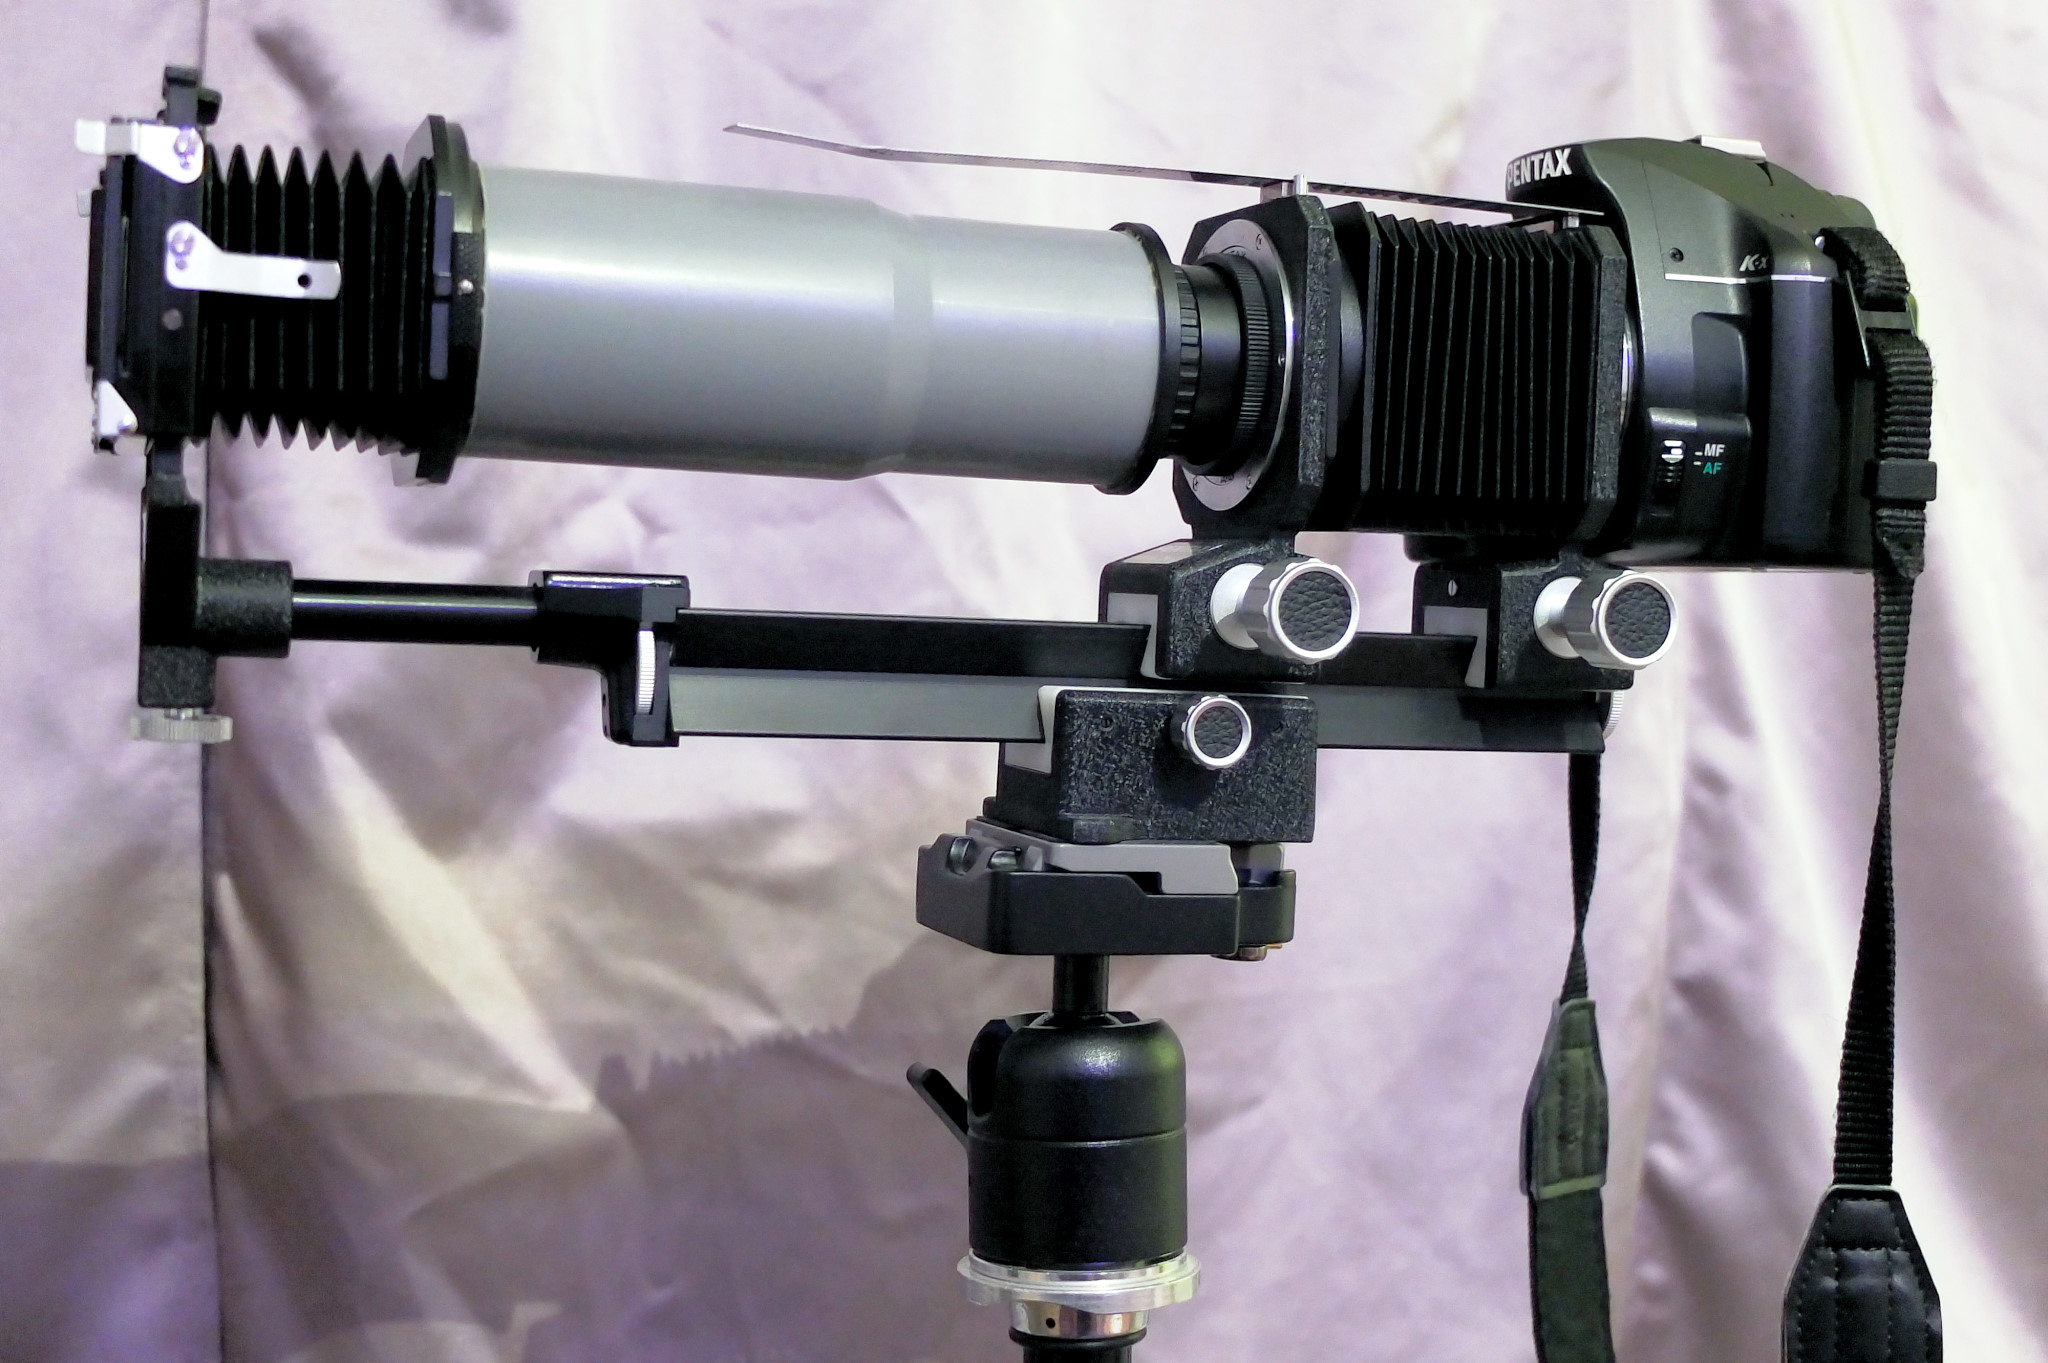
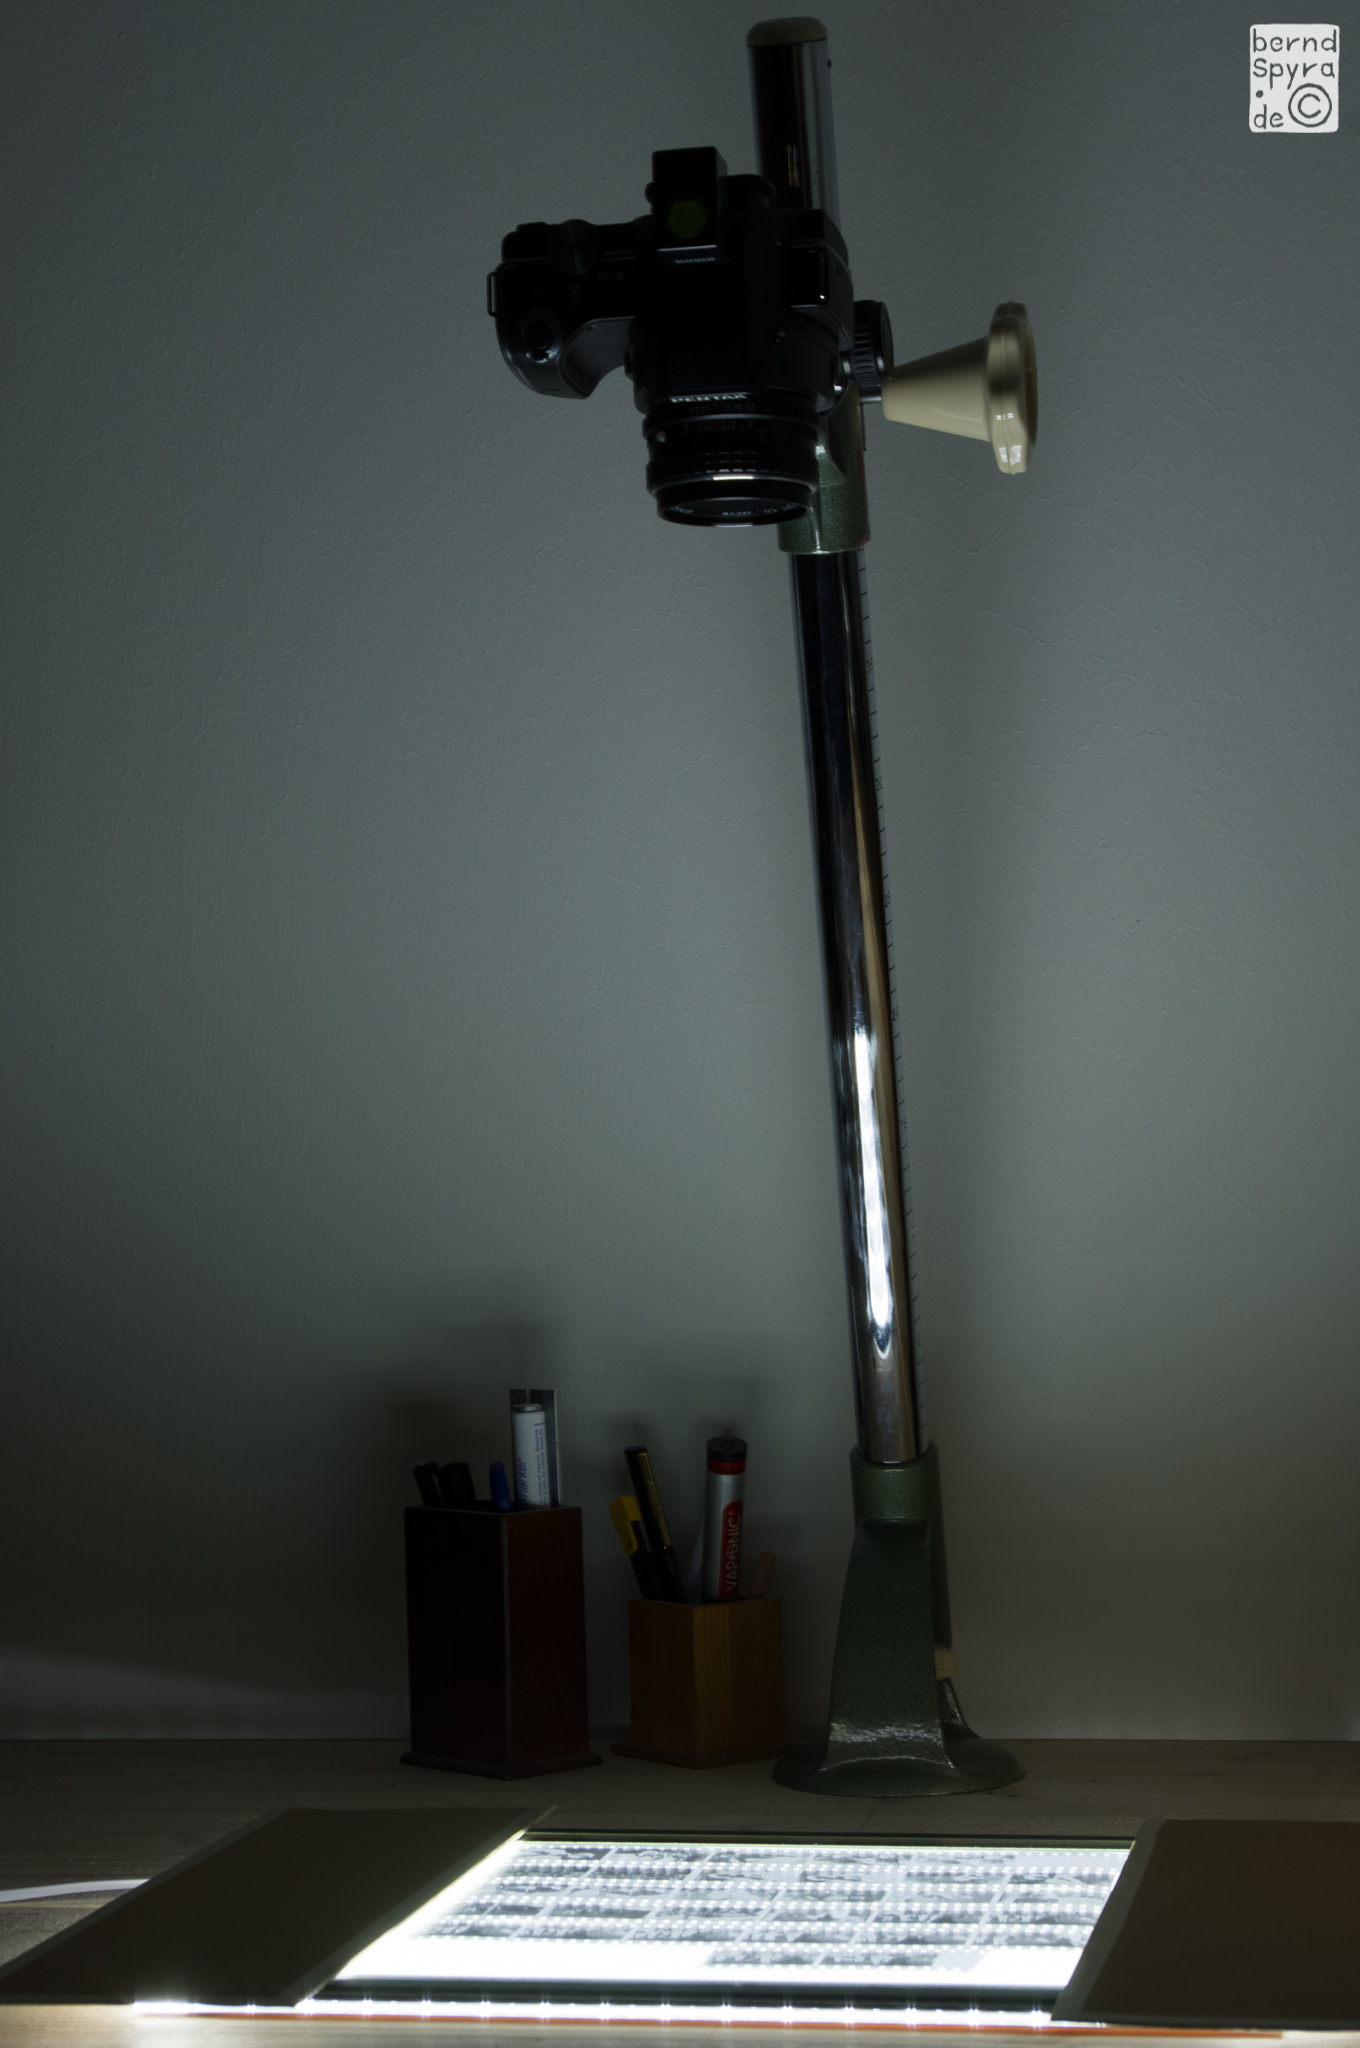
This is the setup I use to make “digital contact sheets” of the film strips which have been developed. To keep them flat, the negative strips are sandwiched between two sheets of anti-reflective glass on a simple LED-lighttable. A digital camera (Pentax KS-1) is positioned above this on an ancient (“made in West-Germany”) repro column. A spirit level in the acessory shoe of the camera helps to ensure its completely level. The digital camera (with an old but sharp Pentax SMC 1:3,5/35mm lens attached) produces digital pictures of all the negatives on a film in one frame, which can be easily inverted to show positive images and allow a first glimps of the “catch of the day”.

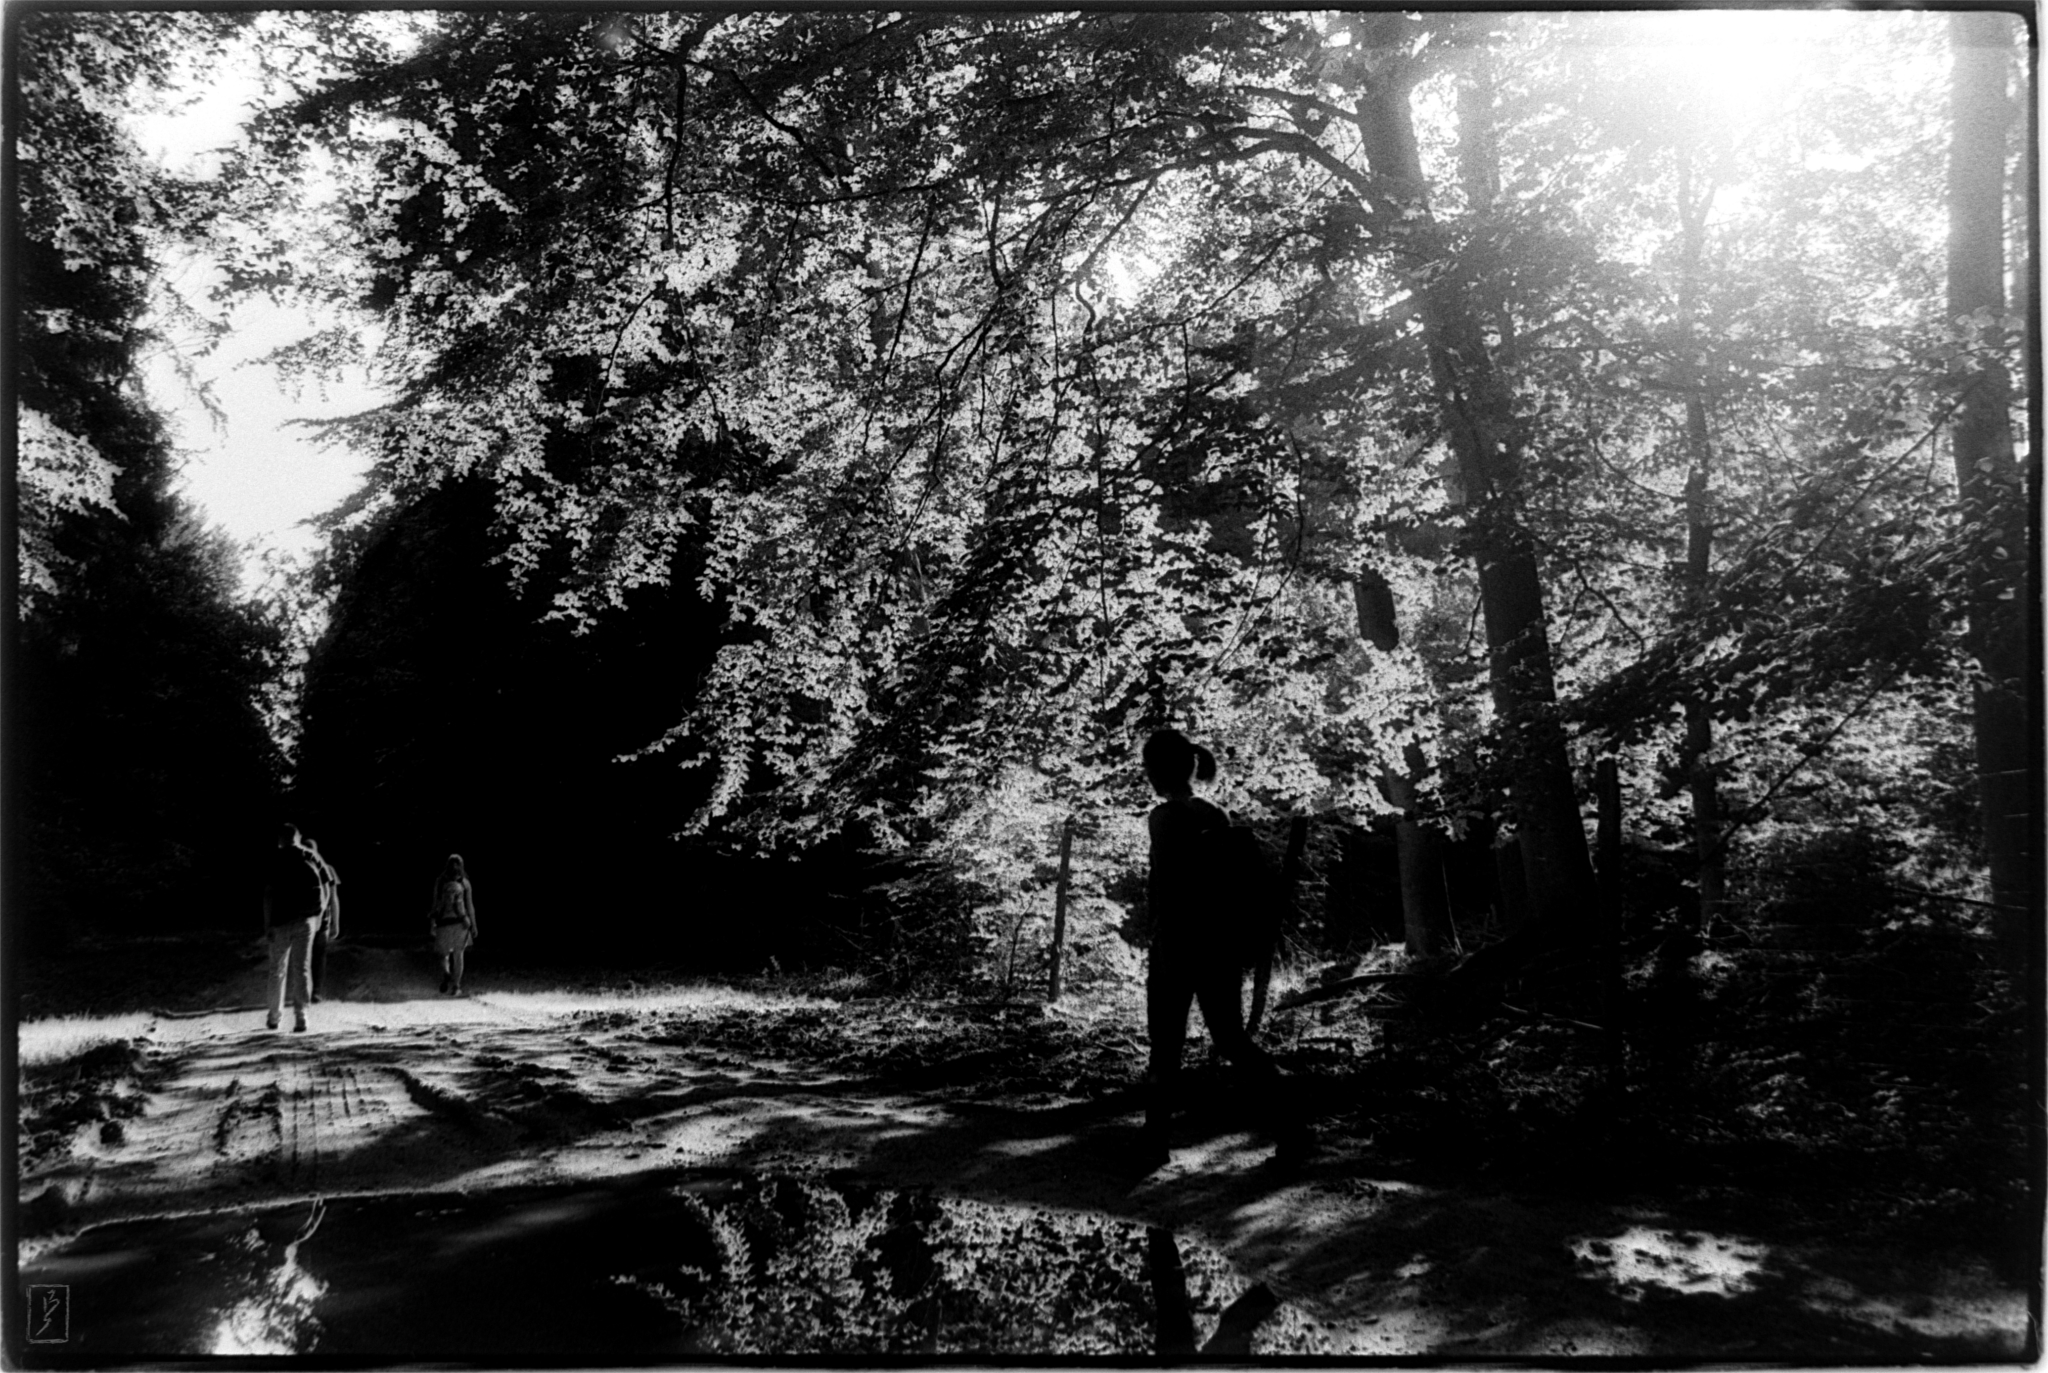
This setup is a reversal of the way traditional — analog — contact sheets are made: Here the film strips would be put on a sheet of photographic paper (the “sensor”) and pressed down (into contact) with a pane of glass, then exposed from above with the enlarger or a simple light bulb. After development of the photographic paper you would be left with the positive images of the negatives on the paper, looking somewhat like the file reproduced below.

Overview file n0112.

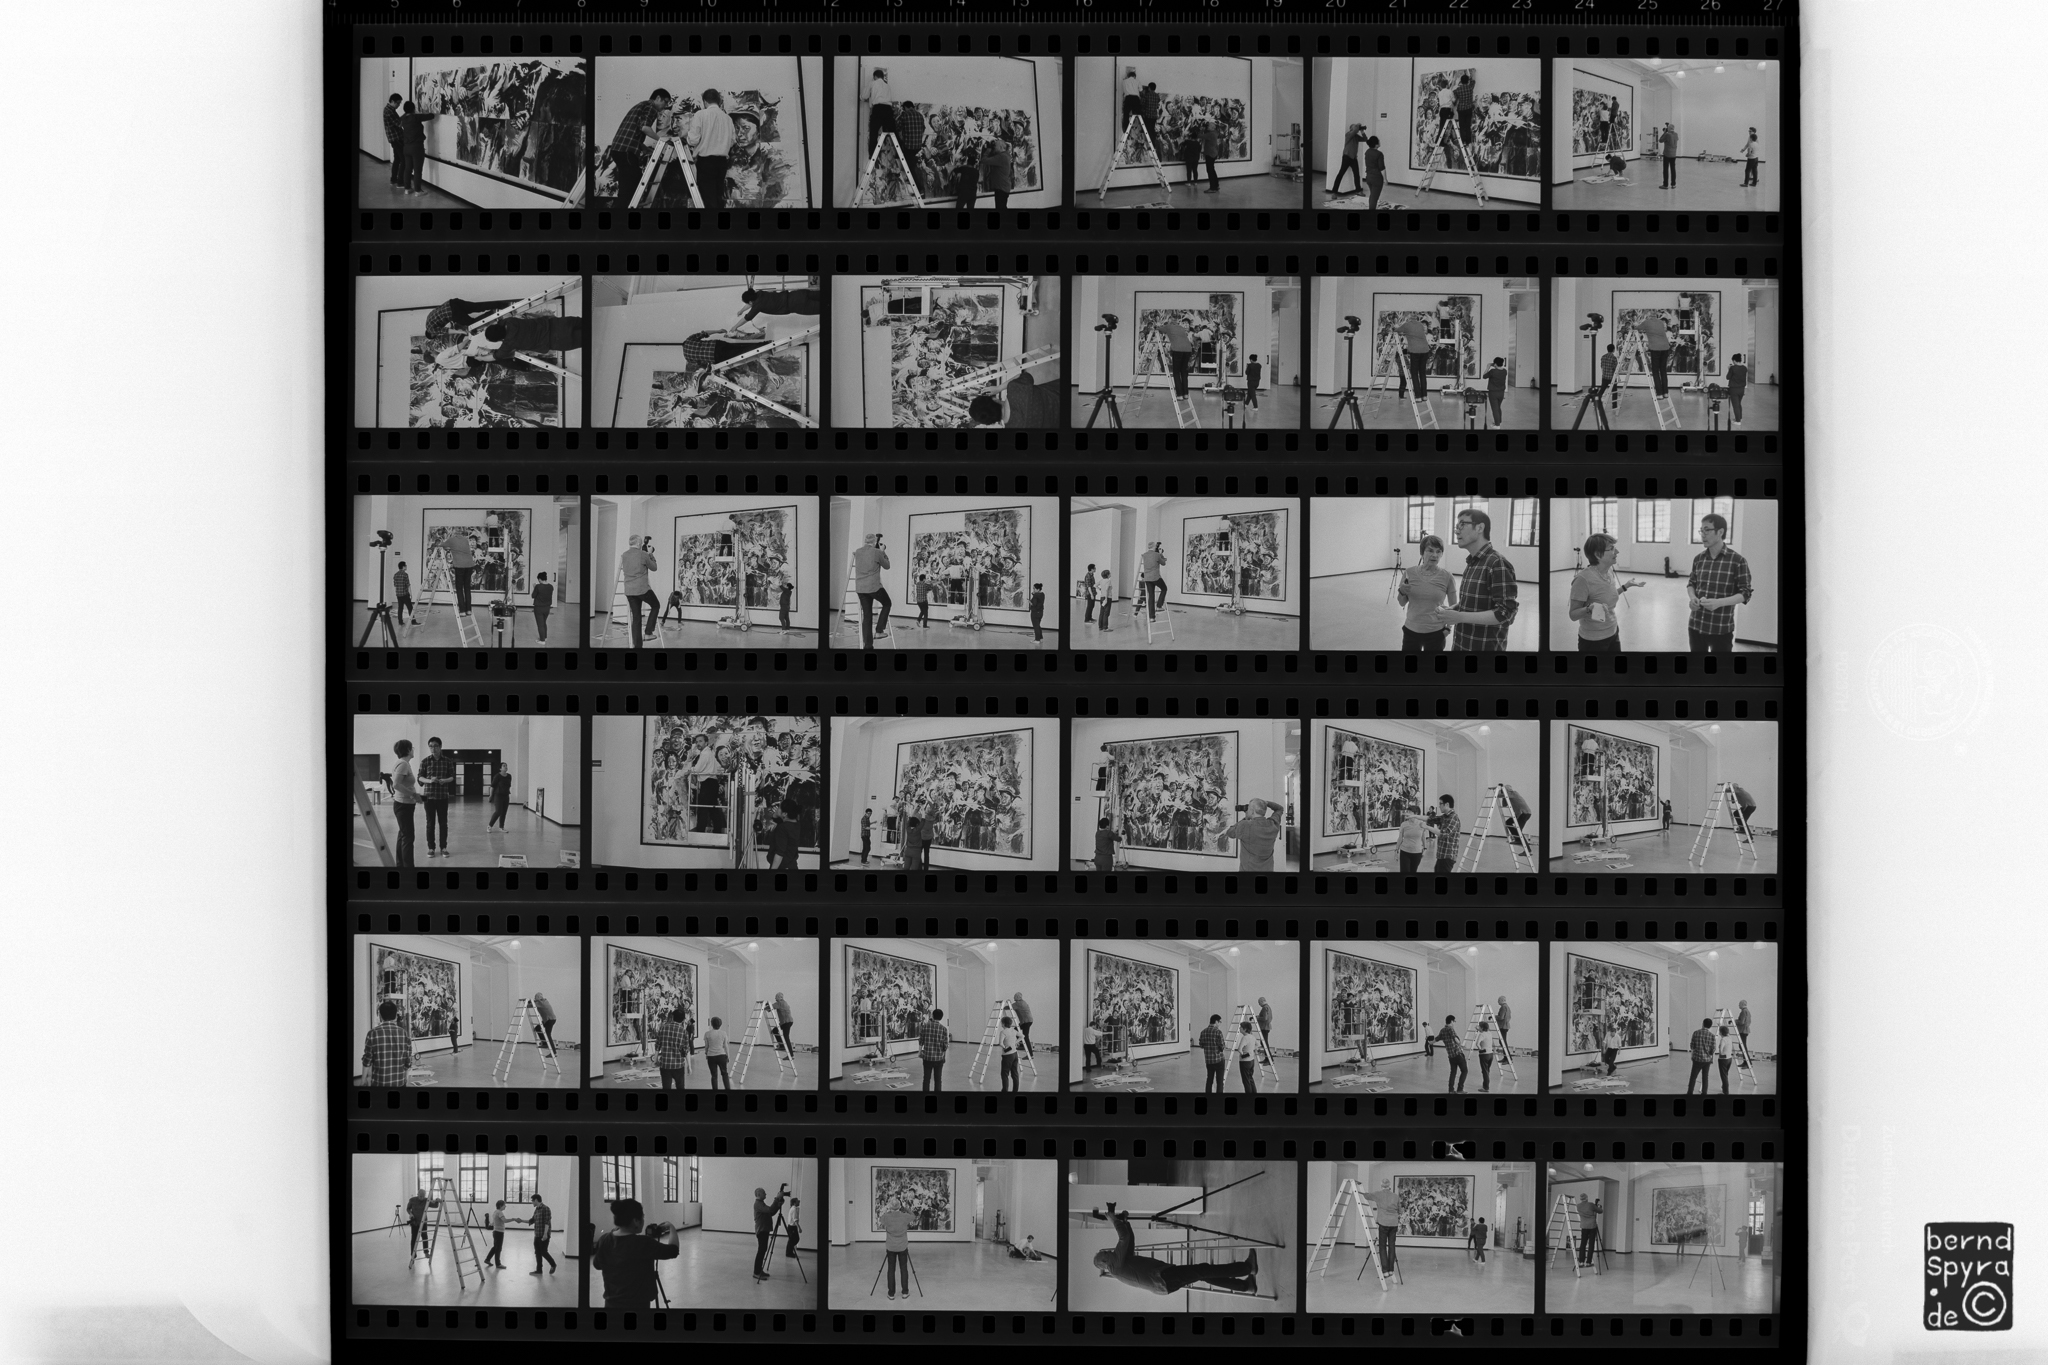
Based on these digital contact sheets, better called overviews, it is decided which negatives to digitize using a slide copier, and later continue to work on fine-tuning said pictures. (This part of the process was already explained here)

Apart from selecting the pictures to immediately work on, the overview files serve as a visual catalog of the “photographic stream of consicousness” recorded with the camera. These overviews are printed too, and can later conveniently be leafed through in the folder that is used to store them and keep them in order. Each overview print is inscribed on the back with the catalog number of the corresponding film, for example “n0123”. This is also the corresponding name of the digital file on the computer. When a negative of that film is turned into another digital file, the number of the negative (being one of 36 exposures possible on a standard strip of 35mm film) is added to the catalog number to give the filename of a finished picture, for example “n0123-36”. This makes it equally easy to retrieve a negative from storage (no matter whether digital or on paper) when it is needed at some later point.


Slow progress

Second iteration of the slide copier setup, now with enlarger lens and section of drainpipe.

The light in Hamburg is still not nearly bright enough for doing photography. This hardly matters, since I don’t have time to roam around outside anyway. What I did have time for was to improve the slide copier setup I’m using to digitize my negatives.

While at my parents home during the Christmas holidays, I rediscovered an old enlarger lens (Schneider-Kreuznach Componon 1:5,6/80) that I had bought a few years ago attached to an enlarger. Turns out it has just the right focal length to work with the camera in this setup. Having determined this, it was just a minor hassle to attach the lens to a M25 to M42 adaptor and that one to a M42 to Pentax-K adaptor which allowed me to connect it to this bellows unit. The distance between the lens and the slide-attachement was still too long to cover with the included bellows, so I had to cut a section of drainpipe to the right length, to act as a shade keeping stray light out. It looks a bit rustic, but it gets the job done. To avoid reflections on the inside of the pipe I used matte-black spraypaint.

Even though the Componon lens is already in quite bad shape (no way around that, new ones are prohibitively expensive), the optical quality still easily beats the zoom lens I was using before.

Progressive progress – digitizing film using a slide copier

In the Sachsenwald near Hamburg.
The Sachsenwald near Hamburg. Digitized using the new process.

In the last few days and weeks I have been too busy to get much real photography done, but I was able to at least improve the speed of my workflow, using a slide copier attached to a digital slr.

The problem

Until now, it took me a long time to get the photos I made into a presentable form. One of the reasons for this was my trusty “Epson Perfection V370 Photo” flatbed scanner. While I cannot fault the quality of its output, it takes about three minutes to scan a negative, which for the usual film strip of 36 negatives quickly adds up to serious time. Furthermore, this is not even counting the time needed to clean up the resulting files (removing dust spots from the pictures, adjusting the grey values, etc.).

The solution?

I decided to try a different approach, using a digital slr to photograph my negatives and thus reduce the time to get digital files. For this, I now use a slide copier, a machine originally used to make copies of slide film (or negatives) with a normal camera. It basically just consists of rails to keep the film to be copied at a precise distance from the camera and provisions to adjust this distance as needed. The one I got was manufactured by Pentax as an accessory for their cameras sometime in the 1980s. Thanks to Pentax still utilising the same lens mount (the infamous K-mount) on today’s digital cameras, it is no problem to seamlessly connect it to a modern camera for producing digital copies of the negatives.

Pentax macro bellows with slide copier attached to a Pentax K-x.
Pentax macro bellows with slide copier attached to a (digital) Pentax K-x.

The process

This is how I do it: The slide copier is connected to a tripod and the camera is attached to its back. The adjustments needed to set the right distance between the negative, lens and camera are done in advance, based on measurements I took before with a test negative. Then the whole apparatus is aimed at a white curtain in direct sunlight, to provide a uniform, strong lightsource to illuminate the negative. After the right exposure setting for the negative has been set on the camera (the histogram displayed by the camera is extremely helpful for this), a full film can be quickly “scanned” with little need for further adjustments. (Perhaps a slightly dense or thin negative might require some exposure compensation, again, I keep an eye on the histogram provided by the camera.) After about a quarter of an hour, the digital files are ready to be uploaded to the computer.

Advantages

The advantages to this process are manyfold. Speed is first and foremost. Using the time saved on digitizing the film for doing the digital darkroom work, I can finish the photos much faster. Secondly, the direct manual settings on the digital camera allow for much more control of the scanning process (at least compared to a consumer-level scanner).

Since this is a “lo-tech” approach, it can also be easily upgraded and used for a long time: Just connect the latest digital camera to the back and the quality of the digital files will keep up with the latest technological advancements. (Or the advancements of second-hand gear, one or two generations behind…)

Finally, while the principle of capturing light shining through the negative with a digital photo-sensor is the same as with the scanner, the files produced by the camera seem to have much more “bite”.

Disadvantages (or room for improvements)

Of course there are disadvantages to this process, too. Most obviously, the slide copier was designed to be used with film cameras, in other words, to use the “full frame” sensor format. Because the digital cameras at my disposal all use the cropped sensor format (APS-C), the scales and measurements on the slide copier change in relation to each other. This for example precludes the use of most of the excellent macro lenses designed for it. I had to make do with a SMC Pentax-M 40-80mm F2.8-4 Zoom lens, set to a focal length of somewhere around 70mm. Of course this lens is a far cry from the optical quality needed for precise reproduction, but for now, the quality is acceptable. Maybe in the (far) future I will invest in a prime lens of around 70mm focal length (perhaps an enlarger lens?), or even (gasp!) a full frame digital slr to bring all the measurements back into their normal range.

But there is no urgency. For now, I am happy with the results. Of course, when using 35mm film it also seems a bit pointless to engage in pixel peeping like this.

Addendum 31.01.2017: Later on I improved the slide copier setup somewhat, you can see it here.